Thursday, June 2, 2016

How to use Wiss Aviation Snips + History

What are aviation tools? 

Photo cred: http://pluspointtracking.com


Josh: Aviation tools are used exclusively on assembling pieces of an aircraft and the one I'm mostly going to be focused on is the Wiss aviation snips.


What does a Wiss aviation snip look like?


Josh: It's depicted on top but can acquire rubber handles for added stability. 


What are aviation snips used for?


Photo cred: http://cdn1.tmbi.com

Josh: Aviation snips are used to cut sheet metal for the assembly of an aircraft. 


Can I use the tool to cut other materials?


Photo cred: http://www.toolstop.co.uk/components/com

Josh: Of course you can, you can cut anything with an equal or lower density to sheet metal and thickness. Of course the tool would be most effective on sheet metal because that's what it was designed for.


What safety precautions should I take when in using the tool?


Josh: The safety precaution I feel is the only one you need to take is to always grab it by the lower part of the handles and don't let any of your fingers around the snip. 


How can I hold the aviation snip to get the most power in snipping?


Josh: Grab the tool by the lowest part of the handles to maximize force.


Which brand is the best in aviation snips?


Josh: Without a doubt Wiss, and they have quite a story as to how they got started. 


How did Wiss come about?


Photo cred: http://www.bestplaces.net

Josh: It all started in Newark, New Jersey year 1848 by a man named Jacob Wiss and his dog. 


His Dog?

Photo cred: http://jwissandsons.com

Josh: That's right, his dog helped him power what was used to sharpen the shears. Without his dog Wiss might have never even had a chance. It's truly a remarkable story.


That's incredible, but what if I don't have access to a Wiss aviation snip, any alternatives?

Photo cred: http://ecx.images-amazon.com

Josh: There is one alternative, you can use a wire cutter but of course it isn't ideal and wouldn't work nearly as seamlessly as the Wiss Aviation Snips. 


Wednesday, February 17, 2016

Functions of a metal filer

What is a metal filer? 


Josh: A metal filer is a tool made of hardened steel that contains a handle and cutting edges.


What are the uses of a metal filer?


Josh: a metal filer as depicted in this picture can be used for forming and smoothing surfaces and most especially, metal.


If I want to form a curved edge on a sheet of metal what tools will I need? 


filer

sand paper

vise grip

metal sheet

Josh: To form a curved edge on a sheet of metal you're going to need a metal filer, a sheet of sandpaper, a vise grip, and of course the sheet of metal.


Are there any safety precautions I should take?


Josh: I would highly suggest using a pair of thick gloves being that the metal filer can cause damage to bare skin if contact is made. 


What is the first step I take in forming the curved edge I want?


left to loosen.

right to secure object

Josh: Before beginning the process of filing you should take a moment to understand how the vise grip works. As depicted in the pictures above left is to loosen the grip and right is to secure the object. Make sure when placing the object in the vise you tighten it well enough to prevent it from moving when filing. Place the sheet of metal in the vise horizontally and secure it tightly. 


What do I do after I have secured my sheet of metal into the vise? 


Josh: You then take your file and begin to start filing out the edge of the metal you want curved.


What technique should I use in order to achieve a perfectly curved edge? 


Josh: I would highly suggest filing away from the metal edge and not towards yourself. While at the same time filing in a curved motion as this will give you the best results possible.


What will my result then be if I performed the step correctly? 


before filing

after filing

Josh: As depicted in the examples above you should achieve these results if performed correctly. If not refer back to the technique I given.


I performed the step correctly but my edges are still a bit rough, what can I do? 


Josh: If your edges are still rough I suggest using sandpaper to completely smooth out any excess metal that the filer didn't get to.


What should my end result look like? 


Josh: If you correctly performed all the steps you should have a result similar to this. If you don't you can refer back to any of the steps above :)


Wednesday, February 10, 2016

How to Assemble a Skateboard +tips

What tools would I need to completely assemble a skateboard?


photo creds to all pics: allsessentialltools.com

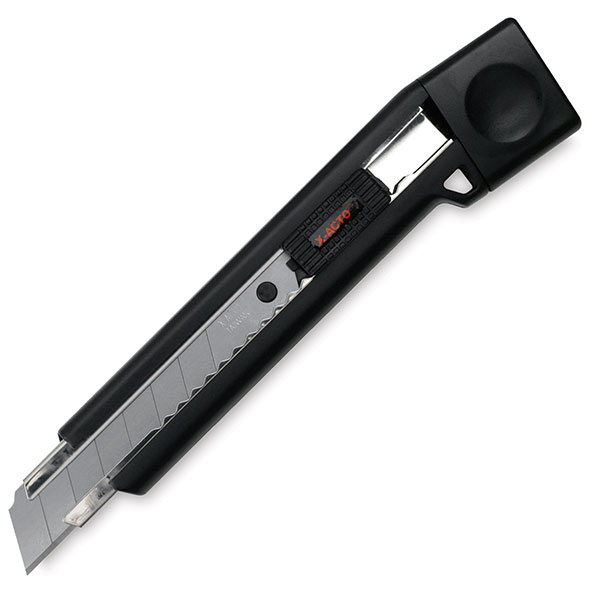
Joshua: To efficiently assemble a skateboard you're going to need a t-tool, star head screw driver (or allen key depending on which bolts you have) , blade and filer. 


What materials will I need to assemble the skateboard? 


photo creds to all pictures: www.skatewarehouse.com

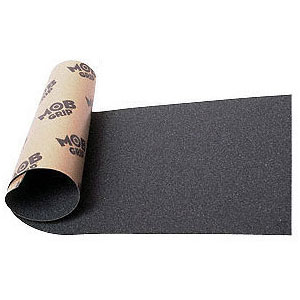
Joshua: To fully assemble your skateboard you're going to need a skateboard deck, wheels, trucks, bearings, hardware(nuts and bolts), and grip tape for your deck.


Are the sizes of the materials important to the assembly of the skateboard?
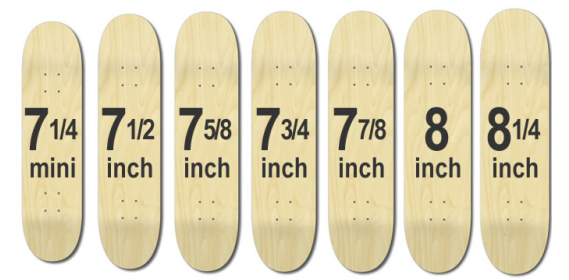

photo cred: http://www.boardpusher.com/userimages/shopimages/653_SK8Sizes%20copy.jpg


Joshua: You essentially can use whatever size bored you want but your choices should be narrowed down according to your shoe size. Wheels can also come in different sizes and even different densities with some being softer than others for different terrains. Same goes for trucks with it all coming down to personal preference.  


What is the first step I take to assembling the skateboard now that I've gathered all my materials and tools needed?


photo cred: http://www.skateshop.ie/oldsite/images/put_on_grip_8.jpg

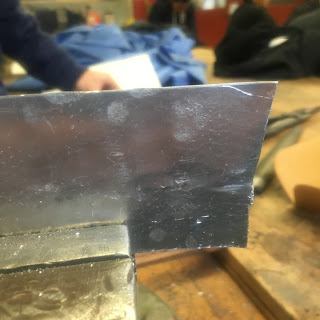
Joshua: Your first step will be to apply the grip tape onto the top of the deck making sure you leave no air bubbles. Then use your filer to scrap the edges of the board giving you an outline of where to cut. Once you have the outline of where to cut you then begin to cut along the edges of the board making sure you're cutting along the sides at a 45 degree angle.  Once you finished cutting off the excess grip you then use that exact same grip to sand the edges of the board (this prevents the grip from rising up). Your final step in gripping the deck is to poke out the 8 holes on the deck with your bolts making them accessible. 
 

After I finished gripping my skateboard deck what is next? 


photo creds: http://f.tqn.com/y/skateboard/1/S/L/E/WorkTrucksReplace.gif

Joshua: After you're finished completely gripping your board you will begin to attach the trucks to the deck using your hardware. Use the long end of your t-tool to grip the nut and either and allen key or starhead screwdriver on the bolt to screw in the bolts. Make sure that all 8 bolts and nuts are screwed on tightly to prevent injury. Make sure both kingpins of the truck are facing the center of the board as installing it the other way can result in serious injury!


I've installed the trucks onto the deck, what's next? 


photo creds: http://f.tqn.com/y/skateboard/1/S/n/D/WorkWheelPry.gif


Joshua: You then install all eight bearings onto the wheels (2 bearings for each wheel). You can use your truck to easily install bearings to all the wheels by placing the bearing through the axle and pressing the wheel hard towards the center of the axle. Repeat process until all eight bearing are installed to all four wheels. 


I've successfully installed the bearings, what's the next step?


photo creds: http://skateparkoftampa.com/spot/productimages/colors/5_54574.jpg

Joshua: Once you've successfully installed the bearings into the wheels you will then need to install the wheels onto the trucks. The wheels don't need to be facing a certain direction but note that the bearings do for not correctly placing them can shorten the lifespan of your bearings. Make sure your bearings are installed with the rubber bearing guards facing outward.  Use the right end of your t-tool  to screw on the bolts securing every wheel onto each axle end of both trucks. 


The wheels are installed, what now?


photo creds: https://i.ytimg.com/vi/p3NXd3DhH08/maxresdefault.jpg


Joshua: If you followed every step correctly you should have a fully functional skateboard ready to be used and some fun to be had!  


How do I adjust the looseness and tightness of my trucks?


photo creds: https://longboardsusa.files.wordpress.com/2014/11/skateboard-trucks.jpg


Joshua: Using the left end of your t-tool you can adjust the tightness of your bolt on your kingpin. The tighter you adjust the bolt the harder it will be to turn, and the looser you allow the bolt to become the easier it is to turn. Of course you shouldn't tighten it too much or too little but again it's all personal preference.  


Any tips on preserving my skateboard to maximize the lifespan? 


photo creds: https://media1.giphy.com/media/rO8k8Y5iMZQ8E/200_s.gif

Joshua: If you really want to expand the life of your skateboard I would suggest not skating during any unsuitable weather conditions such as rain or snow. The water can cause the wood to soften making it more liable to snapping and also cause rust to the trucks and bearings. I also found that loosing the bolts on your trucks just enough to allow the axle to not be exposed by having the bolt surrounding it prevents the axles from getting stripped quickly. When you have a stripped axle it's almost impossible to install any bolt back on unless you have a re-threader tool and that can always be a hassle to find. I hope this helps! 


Wednesday, January 27, 2016

How to use a cable winch

What is a cable winch?

photo creds: https://www.loadrite.com/store/images/P/p-17691.jpg

Josh: A cable winch is a mechanical device used to pull in or let out, otherwise to adjust the "tension" of a rope or wire rope. In its simplest form it consists of a spool and attached hand crank.

How do you use a cable winch? 

Pullers, bearing puller, cable puller, cable winches, cable puller, mechanics, specialist mechanics tools, DIYer, maintenance, wonkee donkee.
                                                

Josh: There is a step by step process in using a cable winch and I will walk you through each one using pictures to better my explanation and give more understanding as well as explaining each step

Step 1: You have to first place the ratchet sprawl into the down position, remember that all steps are essential in following them the exact way it is being depicted.


What is Step 2?

Pullers, bearing puller, cable puller, cable winches, cable puller, mechanics, specialist mechanics tools, DIYer, maintenance, wonkee donkee.

Josh: Your next step (Step 2) is going to turn the crank handle anti-clockwise to unwind as much cable that is needed for the procedure, again this step is depicted above for guidance in performing the step correctly. 


What is step 3? 

Pullers, bearing puller, cable puller, cable winches, cable puller, mechanics, specialist mechanics tools, DIYer, maintenance, wonkee donkee.

Josh: For Step 3 you're going to attach the hook to the load, whatever it might be. (make sure the load you're attaching the winch too isn't to great in mass for the winch to handle)


What is step 4? 

Pullers, bearing puller, cable puller, cable winches, cable puller, mechanics, specialist mechanics tools, DIYer, maintenance, wonkee donkee.

Josh: For Step 4 you're going to push the ratchet switch sprawl from the up position to the down position, very simple.


What is step 5?

                   
Pullers, bearing puller, cable puller, cable winches, cable puller, mechanics, specialist mechanics tools, DIYer, maintenance, wonkee donkee.

Josh: For Step 5 you're going to turn the crank handle clockwise to pull the load by slowly winding the cable. By turning the crank clockwise you're retracting the wire in bringing the load closer.


What is step 6?

Pullers, bearing puller, cable puller, cable winches, cable puller, mechanics, specialist mechanics tools, DIYer, maintenance, wonkee donkee.

Josh: For Step 6 you're going to want to release the load by placing the ratchet sprawl from the up position it was in previously to the now down position.


What is step 7? 

Pullers, bearing puller, cable puller, cable winches, cable puller, mechanics, specialist mechanics tools, DIYer, maintenance, wonkee donkee.

Josh: This is going to be the more tricky step and this step is going to require you to hold the crank handle to keep the load from moving. Once you completed step 6 which was putting the ratchet sprawl in the down position you're then going to release the crank handle slowly ensuring that the switch sprawl is engaged before releasing the handle completely. 


What is step 8? *Final Step* 

Pullers, bearing puller, cable puller, cable winches, cable puller, mechanics, specialist mechanics tools, DIYer, maintenance, wonkee donkee.

Josh: Your last and final Step is going to be to release one ratchet at a time slowly once you have the load in potion and you're done.


Are there any alternatives to the cable winch? 

photo creds: http://www.bulldogwinch.com/cartimages/cat_52.jpg?img_id=201312031102060

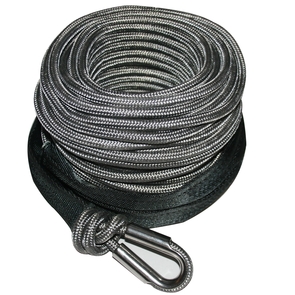
Josh: Of course there are alternatives that you can refer to such as synthetic rope to attach to a load and then later pulled but most of these alternatives such as this one require a lot more strain and usually not preferred or recommended, so believe me when I tell you to go with the cable winch. 

All photos used in this blog entry are credited to www.wonkeedonkeetools.co